Showing posts with label homemade gifts. Show all posts

Mar 26, 2012

Apple and Pear Bread

I needed something homey and comforting... my house has almost not food in it... but I had apples and a few overripe pears. So today I made apple and pear bread. It was delicious. It was homey. It was gone within a few hours of making it.

Sometimes life is really crappy, and hard, and you don't think that you will be able to get up out of bed. If you feel that way take a stab at this bread. You get the joy of peeling and chopping stuff up, pulverizing some pears, whipping it all together in a big bowl, and then enjoying the moist almost cakelike texture of the bread. It's also very quick to do. The thing that takes the longest is chopping the apples.

Ingredients:

2 overripe pears (it doesn't really matter what kind), peeled and pulverized - about 3/4 of a cup
3 apples (I used 2 Granny Smiths and 1 Fuji), peeled and chopped 2-3 cups
3 c flour
1 tsp baking soda
1/4 tsp baking powder
1 tsp salt
1-2 tsp cinnamon
1/8 tsp ground cloves
3 eggs
1 c brown sugar
3/4 c granulated sugar
1/3 c greek yogurt
2 tsp vanilla

Preheat oven to 350 degrees.
In a medium bowl mix dry ingredients together. In a large bowl whisk together eggs,  sugars, greek yogurt, vanilla, and smashed pears. Once well incorporated add your dry ingredients in about 3 batches. Mix well. Add apples and mix into batter. This is a thick batter, don't worry. It is dense, but very moist. Put into two greased loaf pans, and bake for 50-60 minutes. Make sure you do the toothpick test. :)


Pulverized Pears
Apple and Pear Bread

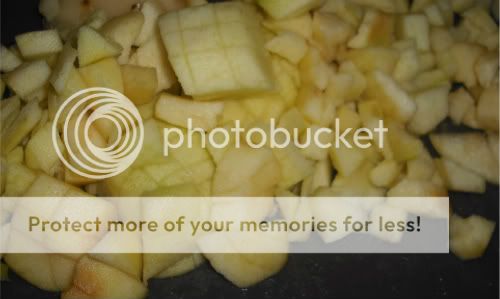
Chopped apples
Apple and Pear Bread
Dry Ingredients
Apple and Pear Bread
Eggs, Yogurt, Sugars, Vanilla, and Pears.
Apple and Pear Bread
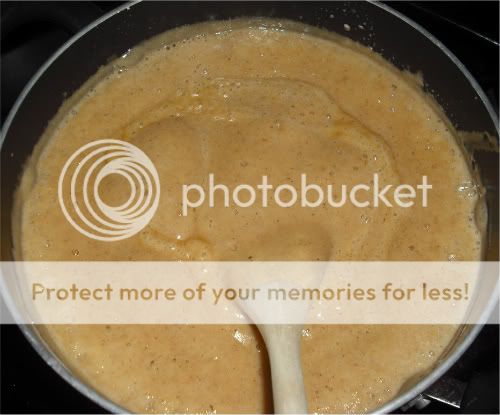
All mixed together
Apple and Pear Bread
Add your dry ingredients
Photobucket
And your apples
Apple and Pear Bread
Pour into two greased loaf pans.
BAKE...
Apple and Pear Bread
Mmmmmm
Apple and Pear Bread

Oct 17, 2011

Peach Raspberry Pie

Ok... I know, I know... another pie. But this one is a fruit pie. A stone fruit pie. Don't you wanna see it??? Don't you wanna TASTE it? You do. You know you do. Heck, I do too and I'm the one that made it. There is something about eating the perfect peach that just makes my insides happy. It's hard to be angry or upset about anything while sucking the juices of these delicious babies. You'll need pie crust obviously, enough for the top and bottom. If you are afraid of pie crust, get over it. You will enjoy your pie so much more knowing that you did it! And pies aren't supposed to look perfect, so if you have a weirdy piece, just be pleased with it! Without further ado....

Ingredients
2 lbs ripe peaches (I used 5 peaches)
2 c fresh raspberries, well washed and drained
2/3 c granulated sugar (you can use less if you get REALLY sweet peaches)
1 teaspoon ground cinnamon
1/2 teaspoon ground nutmeg
1/8 teaspoon ground ginger
1/8 teaspoon ground coriander
3 tablespoons all-purpose flour
1 tablespoon cornstarch
2 teaspoon fresh lemon juice
1 egg, beaten, for egg wash
2 tablespoons sugar to top crust before baking

Wash, peel, and slice your peaches. I like to have both thinner and thicker slices, the thinner ones melt into the filling a bit and the thicker ones are still pretty toothsome. In a medium sized bowl combine peaches and berries. Set aside.
In a small bowl combine sugar, spices, flour, and cornstarch. Stir into fruit, make sure all the dry ingredients are wet. Add lemon juice.

Before preheating your oven, place your rack in the center. Cover the bottom rack with aluminum foil or place a large baking sheet on the lower rack. This pie is.... juicy. If you don't do this, you will have burnt peach juice in the bottom of your oven, not good. Preheat oven to 400 degrees.

Roll out your pie crust. Work fairly quickly, you want the butter to stay cold. Once your crust is in the bottom of your plate go ahead and add the fruit. You can mound it up a bit, but not too much. I have had to remove fruit from pies before, just make sure it's right before you put your top crust on. Put your top crust on, fold your edges over, and perforate with a fork, or slits. If you don't cut some slits your pie will be... explodey. Cover with egg wash, and sprinkle with your reserved sugar. Bake at 400 for 15 minutes. Turn the oven down to 375 and bake about 45 more minutes. Sometimes it needs a few more minutes, you'll be able to tell when it's done because the crust will be golden brown all over, and the juices are bubbling. Remove from oven and allow to cool a bit before serving. This pie is awesome warm with a bit of vanilla ice cream.


Martha's Pie Crust (courtesy of marthastewart.com )
1 1/4 c all-purpose flour, plus more for rolling
1/2 tsp salt
1/2 tsp sugar
1/2 c (1 stick) cold unsalted butter, cut into small pieces
2 to 4 Tbsp ice water


In a food processor, pulse flour, salt, and sugar. Add butter; pulse until mixture resembles coarse meal, with a few pea-size pieces of butter remaining. Sprinkle with 2 tablespoons ice water. Pulse until dough is crumbly but holds together when squeezed (if necessary, add up to 2 tablespoons water, 1 tablespoon at a time). Don't overmix.
Turn dough out onto a large piece of plastic wrap. Fold plastic over dough; press to shape into a 1-inch-thick disk. Refrigerate until firm, at least 1 hour (or up to 3 days).
On a floured piece of parchment paper, roll dough to a 14-inch round with a floured rolling pin. Wrap dough around rolling pin, discarding paper; unroll over a 9-inch pie plate (opposite). Gently fit into bottom and up sides of plate (do not stretch dough).
Using kitchen shears, trim dough to a 1-inch overhang. Fold under itself to form a rim, and press to seal. Using thumb and forefinger, crimp rim of crust. Refrigerate until ready to use, up to 1 day.


Peach Raspberry Pie
Pie crust dry ingred. Make your crusts first, they can be chilling while you finish your prep.
Peach Raspberry Pie
Butter!
Peach Raspberry Pie
Ready to knead, then into the fridge to chill.
Photobucket
Peaches, pitted and ready to be sliced.
Peach Raspberry Pie
Flour, sugar, and spices for the peaches.
Peach Raspberry Pie
Peaches and berries getting their flour bath.
Peach Raspberry Pie
Waiting for filling
Peach Raspberry Pie
Mmmmm looks good huh?
Photobucket
Put your top on.
Raspberry Peach Pie
Prick your holes, add your egg wash and sugar.

Apparently I do not have a picture of the finished pie... so... have a picture of my rhubarb pie... it's almost the same. :D

Rhubarb pie

Sugar Pie

Wait... you've never heard of Sugar Pie? Oh you poor dear. Sugar pie is... well... it's like... holiday love in pie form. It's creamy and spicy and sweet. Do you like Pecan Pie? Then you'll love this. Sugar Pie is basically the gooey sticky yumminess that is Pecan Pie... without the pecans! It's incredibly easy and unbelievable delicious. I will be hurt and offended if you don't try it. Just kidding. But in all seriousness, if you are looking for a new pie to try, or have never made pie before, this is the pie for you. It is incredibly easy and no one will know that it was your first attempt.

Obviously you need to start with a pie crust. I prefer this pie with a tart crust. The crunchy texture marries nicely with the gooey interior. I find that a regular rolled out crust just doesn't add anything. You can use any recipe that you'd like, I will post the one I use but make what you're comfortable with.

We're going to post a little differently today, let me know how you feel about this kind of layout okey dokey?


Sugar Pie
The crew.
Sugar Pie
Add your sugars, spices and salt.
Sugar Pie
Combine well.
Sugar Pie
Add your eggs.
Sugar Pie
And milk.
Sugar Pie
Cook over medium stirring constantly.
Sugar Pie
Until it looks about like this. Then stir in your butter and vanilla.
Sugar Pie
Carefully pour into your pie plate. Bake. Cool. Voila!

Ingredients
1 c granulated sugar
1 c brown sugar
4 Tbsp cornstarch
1/4 tsp salt
1/2 tsp ground cinnamon
1/4 tsp fresh ground nutmeg
1/8 tsp cloves (can be omitted)
3 eggs
1 egg yolk
1 can evaporated milk plus about two tablespoons regular milk or cream (you're looking for 2 cups of liquid)
3 Tbsp unsalted butter, at room temperature
1 1/2 tsp vanilla extract

Preheat oven to 350 degrees F.

In a large saucepan, combine the sugars, cornstarch, cinnamon, salt, nutmeg, and cloves. Mix well. Add the eggs and yolk and combine well. Gradually stir in the milk until well blended.

Turn the flame onto medium heat and cook ingredients, stirring constantly until the filling is thick and bubbly. This will take between 7 and 10 minutes usually. Be careful not to over cook it will change the texture of your pie.

Remove from the heat and stir in the butter and vanilla.

Pour the filling into the pie crust and bake for 40-45 minutes or until a toothpick inserted in the center comes out mostly clean. Remove from the oven and cool. You can serve this warm (my favorite) or cold. It is delicious both ways.


Tart Crust
1 1/2 c all-purpose flour
3/4 tsp salt
2 Tbsp sugar
1/8 tsp baking powder
1/4 c (4 Tbsps) very cold or frozen butter in the smallest pieces you can get
1/4 c vegetable oil
1 Tbsp cream cheese
2 Tbsp cold milk

Combine dry ingredients. Add butter and cream cheese. Work together with a pastry cutter, or you fingers until you have multi sized pieces of butter. Work quickly! We want the butter to stay cold! Whisk together your milk and oil. Add to the butter mixture. Combine quickly with a wooden spoon or fork. Your dough will be chunky, and you'll think it's not done... but it is. Pour directly into your pie pan and press firmly into the bottom and up the sides. I usually use a combination of my fingers and a flat bottomed glass.

This can be used for custard and no bake pies, but you will need to bake the crust off first. To do this blind bake at 350 degrees for about ten minutes. Remove and take off your weights and bake another 5 minutes to brown.

Jan 13, 2011

Homemade chocolates a la York Peppermint Patties

A bit late on posting this, my apologies. I made these during the holidays to give out as gifts to people. They look complicated, and taste amazing, but really aren't that difficult. They do however, take quite a bit of time from beginning to end. Make these with any extracts. I used Maple, Peppermint, Raspberry and Orange. You could use coconut, lemon, or any other extracts your choose. The Peppermint is quite a strong flavor so use the 1/2 tsp measure for that. The other flavors, I did end up adding more of the extracts so that they had a strong and rich flavor. Make sure that you adjust and add a bit more of the confectioners sugar to keep the consistency the same. I also added gel food coloring to mine. If you choose to add the coloring add it to the liquids Before YOU add it to the sugar. Otherwise you'll get splotches of color. This needs to be quite stiff, otherwise when you dip into the chocolate they will get melty and end up an odd shape. Onto the recipe!

Homemade Peppermint Patties
from Gourmet Magazine
2 1/4 cups confectioners sugar
1 1/2 tablespoons light corn syrup
1 1/2 tablespoons water
1/2 teaspoon pure peppermint extract
1 T shortening
1/4 cup confectioner's sugar, for kneading and rolling
10 ounces 70%-cacao bittersweet chocolate, coarsely chopped (Try other kinds of chocolate with different flavors!)

Beat 2 1/4 cups confectioners sugar with corn syrup, water, peppermint extract, shortening, and a pinch of salt using an electric mixer (with paddle attachment if using a stand mixer) at medium speed until just combined. Knead on a work surface dusted with remaining 1/4 cup confectioners sugar until smooth. Roll out between sheets of parchment paper on a large baking sheet into a 7- to 8-inch round (about 1/4 inch thick). Freeze until firm, about 15 minutes. Remove top sheet of paper and sprinkle round with confectioners sugar. Replace top sheet, then flip round over and repeat sprinkling on other side.

Cut out as many rounds as possible with cutter, transferring to a parchment-lined baking sheet. Freeze until firm, at least 10 minutes. Meanwhile, gather scraps, reroll, and freeze, then cut out more rounds, freezing them.

To make chocolate coating:
Melt three fourths of chocolate in a metal bowl set over a saucepan of barely simmering water. Remove bowl from pan and add remaining chocolate, stirring until smooth. Cool until thermometer inserted at least 1/2 inch into chocolate registers 80°F.

Return water in pan to a boil and remove from heat. Set bowl with cooled chocolate over pan and reheat, stirring, until thermometer registers 88 to 91°F. Remove bowl from pan.

A different way to do this would be to place your chocolate chunks into a microwave safe dish and put them in the microwave for 15 second intervals. Stirring after every 15 seconds. When it starts to melt just keep it up. I DID NOT temper my chocolate and everything turned out just fine. So don't be intimidated by this step.

Balance 1 peppermint round on a fork and submerge in melted chocolate, letting excess drip off and scraping back of fork against rim of bowl if necessary, then return patty to sheet. Coat remaining rounds, rewarming chocolate to 88 to 91°F as necessary. Let patties stand until chocolate is set, about 1 hour.

Ingredients for Peppermint Patties
Peppermint Filling
CHOCOLATE
Orange filling
Photobucket
Chocolates
Chocolates
Chocolate Close up
MOOOOOAAAARRRR Chocolates
Chocolates
Insides